
MAX6675 Arduino Example & Datasheet | Thermocouple
- Marques : Analog Devices / Maxim Integrated
- Télécharger: -
- Prix: enquête
- En stock: 17698
- Marque: Analog Devices / Maxim Integrated
- Product Type: Sensor Interface
- Subcategory: Interface ICs
- Emballer: -


Livraison GRATUITE pour les commandes supérieures à HK$250.00

Réponse rapide, devis rapide

Expédition rapide, pas de soucis après-vente

Chaîne originale, garantie de produits authentiques
TCMAX6675-G55 | 0-600C MAX6675 K-TYPE THERMOCOUPLE Temperature MOD
MAX6675
If you need to measure high temperatures with a microcontroller, the MAX6675 is definitely your friend. It reads K-type thermocouples and converts the signal directly into digital data. The best part? It handles cold-junction compensation internally, so you don’t need an extra sensor for ambient temperature correction.
With about ±2°C accuracy and 0.25°C resolution, it covers temperatures from 0°C to 1024°C—perfect for ovens, heating plates, or even industrial furnaces. It also has built-in filtering to keep readings stable and reliable. Its SPI interface is plug-and-play with Arduino and ESP32 boards, and it runs comfortably between 3.0 and 5.5 volts, making your setup simple and quick.
MAX6675 Pinout

| Numéro de code PIN | Nom de la broche | Function Description |
|---|---|---|
| 1 | T- | Thermocouple negative input (K-type) |
| 2 | T+ | Thermocouple positive input (K-type) |
| 3 | GND | Ground (power negative) |
| 4 | VCC | Power input (3.0V ~ 5.5V) |
| 5 | SCK | SPI clock input (from host) |
| 6 | CS | SPI chip select, active low |
| 7 | SO | SPI data output (temperature data) |
| 8 | NC | No connection (internally unused) |
When you’re wiring the MAX6675, pay close attention to thermocouple polarity: for a K-type, T+ is Chromel (positive) and T- is Alumel (negative). Mixing these up can give you incorrect or negative temperature readings. You can power it from either 3.3V or 5V depending on your microcontroller, and make sure to use pull-up resistors or check logic compatibility on the SPI pins (SCK, CS, SO).
Also, remember it’s not hot-swappable, so connect the thermocouple before powering it up to avoid data glitches. The MAX6675 doesn’t have built-in calibration, so if high accuracy matters, consider doing your own calibration.
MAX6675 Equivalent


| Paramètre | MAX6675 | MAX31855K | MAX31856 | MCP9600 |
|---|---|---|---|---|
| Interface Type | SPI | SPI | SPI | I²C |
| Thermocouple Type | K type | K type | Multiple types (K/J/T/N, etc.) | Multiple types (K/J/T/N, etc.) |
| Resolution | 0.25°C | 0.25°C | 0.0078125°C | 0.0625°C |
| Temperature Range | 0 ~ 1024°C | -200 ~ 1350°C | Depends on thermocouple | -200 ~ 1372°C |
| Accuracy (at room temp) | ±2°C | ±2°C | ±1~2°C | ±1.5°C |
| Operating Voltage | 3.0 ~ 5.5V | 3.0 ~ 3.6V | 3.0 ~ 3.6V | 2.7 ~ 5.5V |
| Type de colis | SOP-8 | SOP-8 | SOIC-16 | MSOP, DFN, etc. |
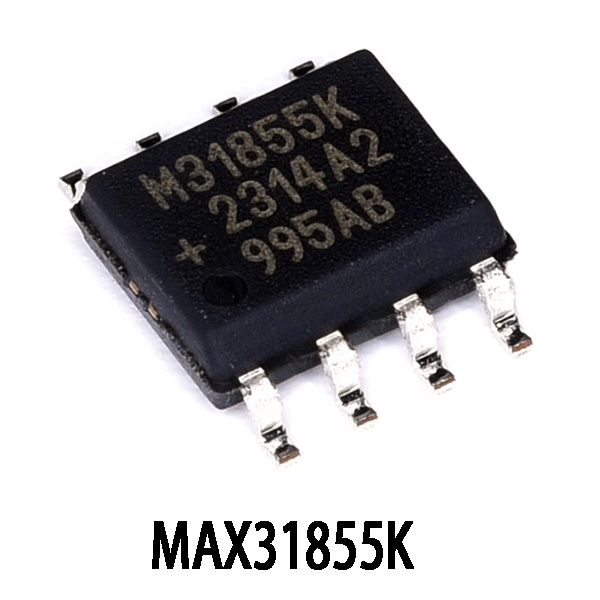
If you’re looking for a direct replacement for MAX6675, the MAX31855K is your best bet. It’s practically identical—same package, same interface, similar accuracy. You can almost swap it right in. Just keep in mind it only works at 3.3V, so don’t accidentally hook it up to 5V.
If you need higher accuracy or support for multiple thermocouple types, consider the MAX31856. It’s much more powerful, but comes in a 16-pin package, meaning you’ll have to redesign your PCB. The MCP9600 is another option, but it uses I²C, making it unsuitable for direct replacement without redesigning your circuit layout.
MAX6675 Thermocouple Circuit Example
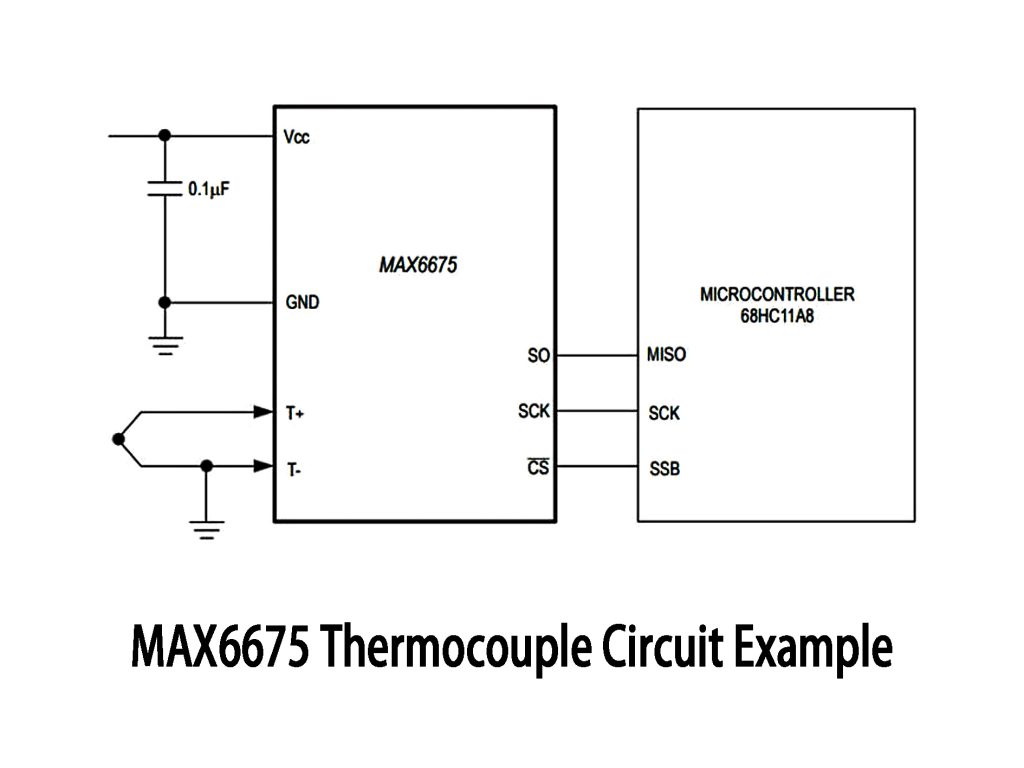
When wiring up the MAX6675, make sure your K-type thermocouple connects correctly: T+ for positive, T- for negative. Mixing these up can cause weird readings or negative values. Power it via VCC and GND, and use a 0.1μF capacitor nearby to filter noise for stable measurements.
For SPI communication, connect SO to your microcontroller’s MISO, SCK to your MCU’s SPI clock, and pull CS low from your controller to start communication. Keep thermocouple wires short to reduce interference; if they’re long, consider adding an RC filter or shield.
The MAX6675 is directly compatible with 5V MCUs. If you’re using a 3.3V system, double-check SPI logic levels to make sure everything matches up smoothly.
MAX6675 Arduino Wiring Project
Here’s how you easily wire a MAX6675 with an Arduino UNO: connect VCC to 5V, GND to ground, SO pin to Arduino D12 (MISO), SCK to D13, and CS to D10 (you can pick another pin like D9 or D8 if you prefer). Double-check your thermocouple polarity (usually red is negative), since reversed connections cause incorrect readings.
For code, use the MAX6675 library—it’s straightforward. After setting up your pins and initializing the sensor, you’ll see temperature readings through the Serial Monitor. If you get constant readings of -1 or 0°C, your thermocouple might be loose or damaged, so reconnect it. Stick to 5V power for best stability, as 3.3V can sometimes give you inconsistent results.
Plus comme ça

TPIC6C596PWG4
Texas Instruments
TPIC6C596PW
Texas Instruments

MC14557BDWR2G
sursemi

74HCT595D,112
Nexperia USA Inc.

SN74AHC594D
Texas Instruments
CD4031BPWR
Texas Instruments
CD4035BPWR
Texas Instruments
CD74HCT166M
Texas Instruments
")
TC74HC165AP(F)
Toshiba Semiconductor et Stockage

SN74HC595ANSR
Texas Instruments

SN74LV166ADBR
Texas Instruments

BU4015BF-E2
Semi-conducteurs Rohm
Ajouter également au panier

W5500
WIZnet

MSP430F2132TPW
Texas Instruments

GD32E230F8P6TR
GigaDevice Semicon Pékin

LTC6085CGN#PBF
Analog Devices Inc.

MCP251863T-E/SSVAO
Technologie des micropuces

DS1013M-15
Analog Devices Inc./Maxim Integrated

BQ25896RTWT
Texas Instruments

PCM2906DB
Texas Instruments

SN65LVPE502CPRGER
Texas Instruments

MT8967ASR1
Technologie des micropuces

MC5404L
Motorola

TDA18211HD/C2/S2551
NXP USA Inc.
Produits connexes
TPIC6C596PWG4
Texas Instruments
TPIC6C596PW
Texas Instruments
MC14557BDWR2G
sursemi
74HCT595D,112
Nexperia USA Inc.
SN74AHC594D
Texas Instruments
CD4031BPWR
Texas Instruments
CD4035BPWR
Texas Instruments
CD74HCT166M
Texas Instruments
TC74HC165AP(F)
Toshiba Semiconductor et Stockage
SN74HC595ANSR
Texas Instruments
SN74LV166ADBR
Texas Instruments
BU4015BF-E2
Semi-conducteurs Rohm
CD4094BPW
Texas Instruments
SN74LV595AQPWRQ1
Texas Instruments

SN74LV166ADGVR
Texas Instruments

CD74HC595NSR
Texas Instruments
SN74LV595ANSR
Texas Instruments
SN74LV594ADBR
Texas Instruments

SN74F299DWR
Texas Instruments
BU4021BF-E2
Semi-conducteurs Rohm

74AHCT164BQ-Q100X
Nexperia USA Inc.
74HCT597D-Q100J
Nexperia USA Inc.
SN74LV165APWT
Texas Instruments
SN74AHCT594DBR
Texas Instruments
74HC594D-Q100,118
Nexperia USA Inc.

CD74HC195NSR
Texas Instruments

74LVC594ABQ-Q100X
Nexperia USA Inc.

74AHCT164D-Q100J
Nexperia USA Inc.

74AHCT164PW-Q100J
Nexperia USA Inc.
NPIC6C596BQ-Q100,1
Nexperia USA Inc.
Veuillez envoyer une demande de devis, nous vous répondrons immédiatement.
