
ATMEGA88PA-PU datasheet, price & pdf Atmel
- कोरप्रोसेसर: एवीआर
- कोर आकार: 8 बिट
- बाह्य उपकरण: ब्राउन-आउट डिटेक्ट/रीसेट, POR, PWM, WDT
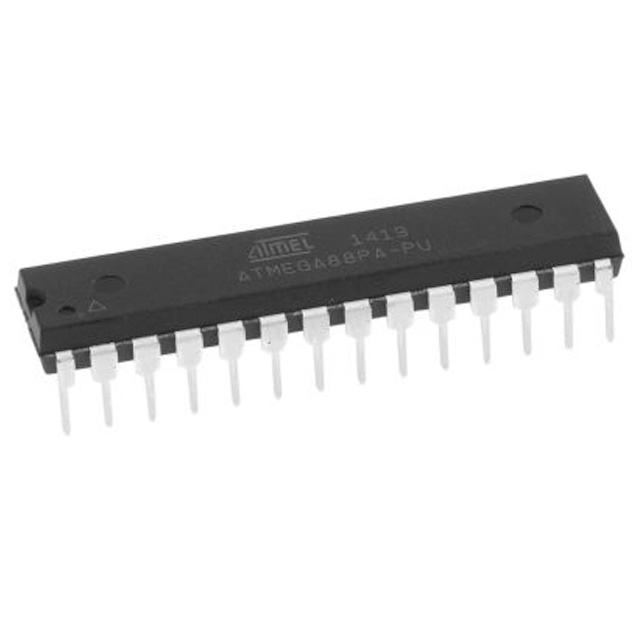
- पैकेट: 28-DIP (0.300, 7.62mm)


HK$250.00 से अधिक ऑर्डर पर निःशुल्क डिलीवरी

त्वरित प्रतिक्रिया, त्वरित उद्धरण

फ्लैश शिपमेंट, बिक्री के बाद कोई चिंता नहीं

मूल चैनल, प्रामाणिक उत्पादों की गारंटी
[SGeC] ATMEGA88PA-PU 8-bit AVR Microcontroller with 8K Bytes In-System Programmable Flash
ATmega88PA-PU
The ATmega88PA-PU is a handy microcontroller that packs impressive performance into your projects. It’s built around an AVR-enhanced RISC architecture, offering speeds up to 20 MIPS at 20 MHz. You’ve got 8 KB Flash memory for your programs, 1 KB SRAM for quick data handling, and 512 bytes EEPROM for storing critical settings. It also comes loaded with useful peripherals, like timers, a USART for serial communication, SPI and I²C interfaces, plus a 10-bit ADC and analog comparator for precise measurements. With 23 configurable I/O pins and multiple package options, it fits comfortably into various designs. And with its wide voltage range (1.8–5.5 V) and several low-power modes, it’s great at saving energy, perfect if battery life matters in your application.
ATmega88PA-PU Pinout

| पिन नंबर | पिन नाम | Function Description |
|---|---|---|
| 1 | PC6 | Reset (RESET) |
| 2 | PD0 | UART Receive (RXD) |
| 3 | PD1 | UART Transmit (TXD) |
| 4 | PD2 | External Interrupt 0 (INT0) |
| 5 | PD3 | External Interrupt 1 (INT1) |
| 6 | PD4 | Timer/Counter 0 Output Compare B (OC0B) |
| 7 | वीसीसी | Power Supply |
| 8 | जीएनडी | मैदान |
| 9 | PB6 | External Crystal Input (XTAL1) |
| 10 | PB7 | External Crystal Input (XTAL2) |
| 11 | PD5 | Timer/Counter 0 Output Compare A (OC0A) |
| 12 | PD6 | Analog Comparator Positive Input (AIN0) |
| 13 | PD7 | Analog Comparator Negative Input (AIN1) |
| 14 | PB0 | SPI Clock (SCK) |
| 15 | PB1 | SPI Master Output, Slave Input (MOSI) |
| 16 | PB2 | SPI Master Input, Slave Output (MISO) |
| 17 | PB3 | SPI Slave Select (SS) |
| 18 | PB4 | Timer/Counter 1 Output Compare A (OC1A) |
| 19 | PB5 | Timer/Counter 1 Output Compare B (OC1B) |
| 20 | AVCC | Analog Power Supply |
| 21 | AREF | Analog Reference Voltage Input |
| 22 | जीएनडी | मैदान |
| 23 | PC0 | Analog Input Channel 0 (ADC0) |
| 24 | PC1 | Analog Input Channel 1 (ADC1) |
| 25 | PC2 | Analog Input Channel 2 (ADC2) |
| 26 | PC3 | Analog Input Channel 3 (ADC3) |
| 27 | PC4 | Analog Input Channel 4 (ADC4) |
| 28 | PC5 | Analog Input Channel 5 (ADC5) |
When you’re wiring the ATmega88PA-PU, make sure your VCC and AVCC pins are connected to a stable, positive power source, and your GND pins go straight to ground. Even if you’re not using the ADC, connect AVCC to VCC—it keeps things stable internally. The RESET pin (PC6) lets you manually reset your controller; usually, you’ll hook it up with a pull-up resistor and a simple reset button. If you’re using an external crystal for timing, connect it properly to the XTAL1 and XTAL2 pins for an accurate clock signal. The AREF pin sets your ADC’s reference voltage—connect it externally if your application needs higher precision. Finally, unused pins should either be set as outputs at low level or activated with internal pull-ups to avoid interference and save power.
ATmega88PA-PU Equivalent Microcontroller


| पैरामीटर | ATmega88PA-PU | ATmega88P-PU | ATmega168PA-PU | ATmega328P-PU |
|---|---|---|---|---|
| Architecture | AVR 8-bit | AVR 8-bit | AVR 8-bit | AVR 8-bit |
| Flash Memory | 8 KB | 8 KB | 16 KB | 32 KB |
| SRAM | 1 KB | 1 KB | 1 KB | 2 KB |
| ईईपीरोम | 512 bytes | 512 bytes | 512 bytes | 1 KB |
| Max Operating Frequency | 20 MHz | 20 MHz | 20 MHz | 20 MHz |
| Pin Count and Package | 28-pin PDIP | 28-pin PDIP | 28-pin PDIP | 28-pin PDIP |
| ADC Channels | 6 channels | 6 channels | 6 channels | 6 channels |
| Operating Voltage | 1.8~5.5V | 1.8~5.5V | 1.8~5.5V | 1.8~5.5V |
| Communication Interfaces | UART, SPI, I²C | UART, SPI, I²C | UART, SPI, I²C | UART, SPI, I²C |
All these microcontrollers share the same package and pin layout, making them straightforward replacements for your ATmega88PA-PU. But here’s the thing: you’ll want to pay close attention to their memory sizes. If you choose something with larger storage, like the ATmega168PA or ATmega328P, your hardware will stay compatible, but you’ll probably need to recompile your code to take advantage of the extra memory. On the other hand, if you’re picking a model with identical memory size, such as the ATmega88P-PU, you can simply swap it in without making changes to your existing code. Just double-check memory specs when selecting a substitute to ensure your software runs smoothly and you avoid any unnecessary troubleshooting.
atmega88pa-pu programming with avr-gcc

First off, you’ll write your program in C, keeping it simple and clear. Once that’s done, your code needs preprocessing, where it gets cleaned up and ready for the next steps. After preprocessing, the code gets assembled—essentially translated into instructions the microcontroller understands. Next, you’ll convert the assembled file into a .hex format using avr-objcopy. The .hex file is exactly what your ATmega88PA-PU needs. Finally, you’ll flash this file directly onto your chip with avrdude, an easy-to-use tool that transfers the code onto your ATmega. That’s it! Once uploaded, your microcontroller will run your code exactly how you programmed it. Just follow these steps, and you’ll have your ATmega88PA-PU running smoothly in no time.
atmega88pa-pu vs atmega328p
| पैरामीटर | ATmega88PA-PU | ATmega328P |
|---|---|---|
| Architecture | 8-bit AVR | 8-bit AVR |
| Flash Memory | 8 KB | 32 KB |
| SRAM Capacity | 1 KB | 2 KB |
| EEPROM Capacity | 512 bytes | 1 KB |
| Max Operating Frequency | 20 MHz | 20 MHz |
| ADC Channel Count | 6 (PDIP package) | 6 (PDIP package) |
| ADC Resolution | 10-bit | 10-bit |
| I/O Pin Count | 23 | 23 |
| PWM Channels | 6 | 6 |
| Communication Interfaces | USART, SPI, I²C | USART, SPI, I²C |
| Operating Voltage | 1.8 ~ 5.5 V | 1.8 ~ 5.5 V |
| Package Types | PDIP-28, TQFP-32 | PDIP-28, TQFP-32 |
| Power Saving Modes | Multiple power-saving modes | Multiple power-saving modes |
| Common Applications | Small-scale projects, resource-limited applications | Broader range of applications, Arduino UNO core MCU |
When you’re thinking about swapping an ATmega88PA-PU with an ATmega328P, here are a few things to keep in mind. The ATmega328P has a lot more storage—32 KB of Flash, 2 KB of SRAM, and 1 KB of EEPROM—perfect if your project needs extra space. The good news is, both chips have almost identical pin layouts and packaging (like PDIP-28), so usually, you can swap them out directly without modifying your PCB design. Plus, since their internal registers and peripherals match up closely, your existing code typically works without major changes. Just remember: if your code runs fine on the 328P, switching back to an 88PA might cause issues due to limited memory. Also, the 328P costs slightly more, but offers better resources and easier availability.
atmega88pa-pu breadboard project

Important Tips for Your Breadboard Project:
For your ATmega88PA-PU breadboard project, keep your power supply stable at 5 volts DC—too high or low voltage can damage your chip or cause malfunction. Ensure pins 7 and 20 (VCC) are powered, and pins 8 and 22 (GND) grounded. When using an external crystal, connect it to XTAL1 and XTAL2 with 22pF capacitors grounding each end for stable timing. Attach the RESET pin (pin 1) to 5 volts via a 10kΩ resistor. Organize your wiring neatly to minimize errors and interference, and handle the chip carefully to avoid static electricity damage.
Pros and Cons of Using a Breadboard:
Breadboards offer quick setup, flexibility, and low cost—perfect for beginners or prototype testing without soldering. Components can be easily adjusted or swapped, ideal for experimentation and teaching. However, breadboards aren’t suited for high-frequency circuits due to parasitic capacitance and inductance, which cause signal issues. Connections might loosen over time, affecting reliability. Additionally, breadboards can’t handle high current or power applications due to small internal contacts. Dense wiring setups can also lead to signal interference or crosstalk, making breadboards better for initial prototyping than for final, high-performance projects.
atmega88pa-pu isp programming guide
Let’s get your ATmega88PA-PU up and running. First off, carefully hook up your ISP programmer: MOSI goes to pin 17, MISO to pin 18, SCK to pin 19, RESET to pin 1, your 5V power supply to pins 7 and 20, and ground to pins 8 and 22. Always double-check these connections—you don’t want to fry your chip!
Next, grab AVRDUDE and install it; it makes uploading your firmware easy. Prefer visuals? Arduino IDE (with MiniCore) or Atmel Studio are great alternatives.
Then, open your command line and type avrdude -c usbasp -p m88p. You should get a chip signature like 0x1E930F. If it doesn’t appear, go back and recheck those wires.
Flash your firmware with avrdude -c usbasp -p m88p -U flash:w:your_firmware.hex:i. Consider setting fuses (carefully!) to configure things like clock speed using avrdude -c usbasp -p m88p -U lfuse:w:0xFF:m -U hfuse:w:0xDF:m -U efuse:w:0xF9:m.
Finally, verify your firmware by running a quick check, and always ensure stable power and correct chip orientation if things don’t go smoothly.
atmega88pa-pu for low power applications
If you’re looking for an efficient, battery-friendly microcontroller, the ATmega88PA-PU is perfect. Imagine building remote environmental sensors for farms or weather stations—it can wake briefly, take temperature, humidity, or air quality readings, then sleep again, maximizing your battery life. In wireless sensor networks, saving energy is critical, and this chip handles that easily by shutting down unused functions and slipping into deep sleep. If you’re creating clocks or timers, the ATmega88PA-PU maintains accurate timing without draining much power, great for places where electricity is limited. It also shines in wearable devices like fitness trackers, where you need continuous monitoring without frequent recharging. Finally, in home automation sensors like motion or door detectors, it stays asleep most of the time, waking only when necessary, which means fewer battery changes for you. Basically, this microcontroller helps you design smarter, more energy-efficient gadgets that perform reliably over the long haul.
इसी तरह और भी

ZXCW6100S28
डायोड्स इन्कॉर्पोरेटेड

TDA8541T/N1,112
एनएक्सपी यूएसए इंक.

TDA8541T/N1,118
एनएक्सपी यूएसए इंक.

TDA7056B/N1,112
एनएक्सपी यूएसए इंक.
,SOT157-2.JPG "TDA2616Q/N1,112")
TDA2616Q/N1,112
एनएक्सपी यूएसए इंक.

TDA8547TS/N1,112
एनएक्सपी यूएसए इंक.
TDA8547TS/N1,118
एनएक्सपी यूएसए इंक.

NE58633BS,157
एनएक्सपी यूएसए इंक.
NE58633BS,115
एनएक्सपी यूएसए इंक.

SA58670BS,115
एनएक्सपी यूएसए इंक.

TS4961TIQT
एसटीमाइक्रोइलेक्ट्रॉनिक्स
,SOT523-1.JPG "TFA9842J/N1,112")
TFA9842J/N1,112
एनएक्सपी यूएसए इंक.
कार्ट में भी जोड़ें

CY44C034WQN-G-AVE2
साइप्रस सेमीकंडक्टर कॉर्प

MAX488CSA
एनालॉग डिवाइसेज इंक./मैक्सिम इंटीग्रेटेड
QS74FCT163TS0X
गुणवत्ता अर्धचालक

E-TDA7377A
एसटीमाइक्रोइलेक्ट्रॉनिक्स

SN74AVC16245DGGR
टेक्सास इंस्ट्रूमेंट्स
BCM56224B0IPBG
ब्रॉडकॉम लिमिटेड

TLP7820(TP4,E
तोशिबा सेमीकंडक्टर और स्टोरेज

MACH131SP-7VC
लैटिस सेमीकंडक्टर कॉर्पोरेशन

MAX98358EWL+T
एनालॉग डिवाइसेज इंक./मैक्सिम इंटीग्रेटेड

PCM1800E/2KG4
टेक्सास इंस्ट्रूमेंट्स

GTLP10B320MTDX
Onsemi
EC-VA-H265-10B-60-4K-OPVIC-0000
System-On-Chip (SOC) Technologies Inc.
संबंधित उत्पाद
ZXCW6100S28
डायोड्स इन्कॉर्पोरेटेड
TDA8541T/N1,112
एनएक्सपी यूएसए इंक.
TDA8541T/N1,118
एनएक्सपी यूएसए इंक.
TDA7056B/N1,112
एनएक्सपी यूएसए इंक.
TDA2616Q/N1,112
एनएक्सपी यूएसए इंक.
TDA8547TS/N1,112
एनएक्सपी यूएसए इंक.
TDA8547TS/N1,118
एनएक्सपी यूएसए इंक.
NE58633BS,157
एनएक्सपी यूएसए इंक.
NE58633BS,115
एनएक्सपी यूएसए इंक.
SA58670BS,115
एनएक्सपी यूएसए इंक.
TS4961TIQT
एसटीमाइक्रोइलेक्ट्रॉनिक्स
TFA9842J/N1,112
एनएक्सपी यूएसए इंक.

SA58632BS,118
एनएक्सपी यूएसए इंक.

TDA1308TT/N2,118
एनएक्सपी यूएसए इंक.
TDA8552TS/N1,112
एनएक्सपी यूएसए इंक.
TDA8552TS/N1,118
एनएक्सपी यूएसए इंक.
TDA1517/N3,112
एनएक्सपी यूएसए इंक.
TDA7056A/N2,112
एनएक्सपी यूएसए इंक.

SA58671UK,027
एनएक्सपी यूएसए इंक.

TDA8948J/N1,112
एनएक्सपी यूएसए इंक.
TFA9843AJ/N1,112
एनएक्सपी यूएसए इंक.

SA58637BS,118
एनएक्सपी यूएसए इंक.

TDA7052A/N2,112
एनएक्सपी यूएसए इंक.

TDA8551T/N1,112
एनएक्सपी यूएसए इंक.

TDA8551T/N1,118
एनएक्सपी यूएसए इंक.
SA58672UK,027
एनएक्सपी यूएसए इंक.
SA58670ABS,115
एनएक्सपी यूएसए इंक.

SA58631TK,157
एनएक्सपी यूएसए इंक.
SA58631TK,118
एनएक्सपी यूएसए इंक.
SA58631TK,115
एनएक्सपी यूएसए इंक.
कृपया आरएफक्यू भेजें, हम तुरंत जवाब देंगे।
