
LM35DZ/NOPB データシート、価格、PDF
- センサータイプ: アナログ、ローカル
- 出力タイプ: アナログ電圧
- 特徴: -
- パッケージ: TO-226-3、TO-92-3(TO-226AA)


HK$250.00以上のご注文で送料無料

迅速な対応、迅速な見積もり

すぐに発送、アフターサービスも安心

オリジナルチャネル、本物の製品の保証
How to use LM35 temperature sensor with arduino
LM35DZ/NOPB
The LM35DZ is a handy analog temperature sensor. You don’t need any external calibration—just power it up and read the voltage. It outputs 10mV per degree Celsius, so it’s easy to measure temperature directly. At room temperature, you’re looking at about ±0.5°C accuracy, and it works nicely from 0 to 100°C. Perfect for tracking room temps, battery heat, or consumer electronics. It accepts a wide voltage range (4 to 30V) and uses very little current, meaning it won’t heat itself up over time. The TO-92 three-pin package makes wiring to Arduino or STM32 microcontrollers a breeze. This LM35DZ/NOPB model is lead-free, environmentally friendly, and offers solid long-term stability from Texas Instruments.
LM35DZ/NOPB Pinout Connection
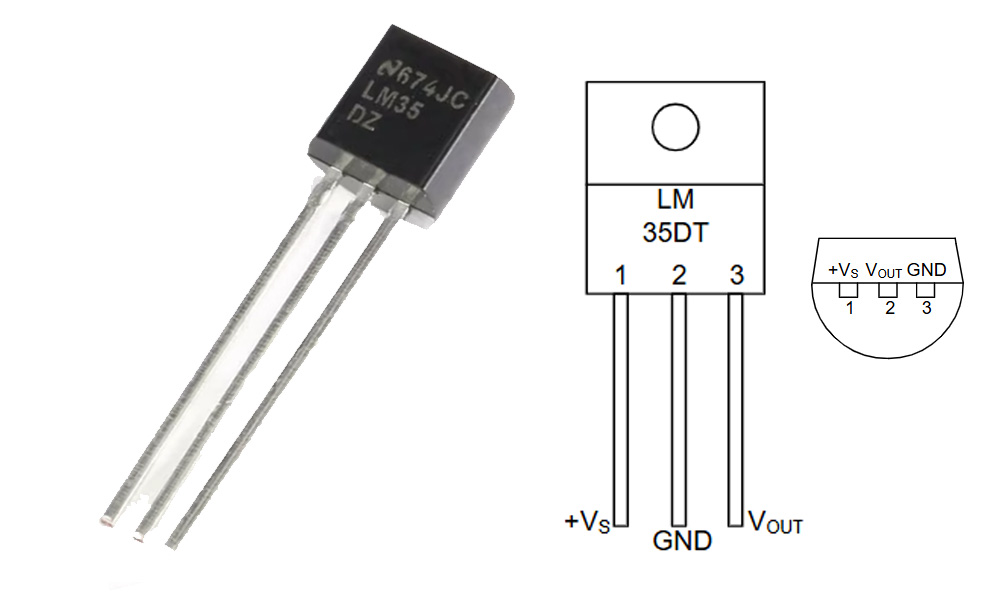
| ピン番号 | ピン名 | 機能説明 |
|---|---|---|
| 1 | V外 | Output pin, analog voltage proportional to temperature |
| 2 | GND | Ground (negative terminal) |
| 3 | VCC | Power supply (positive, +4V to +30V) |
When you’re hooking up the LM35DZ, just face the flat side toward you—the pins from left to right are output, ground, and power. Only three wires needed, nice and simple. You can feed the output directly into your MCU’s ADC pin, reading temperature at 10mV per degree Celsius. Keep your power supply clean, though; noise can mess with your readings. Also, try to keep it away from hot components or heavy currents for more accurate results. If you’re connecting to a microcontroller, adding a small 0.1μF capacitor on the output pin helps smooth out any noise. It’s a straightforward, accurate sensor, perfect for embedded systems or environmental monitoring projects.
LM35DZ/NOPB Equivalent Temperature Sensor

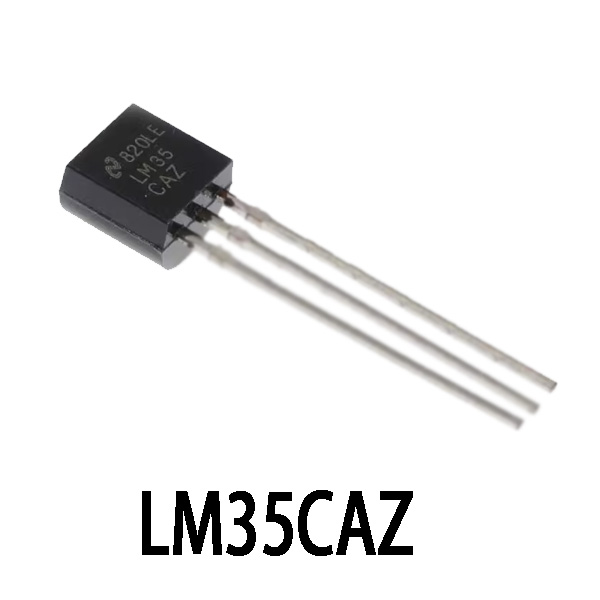
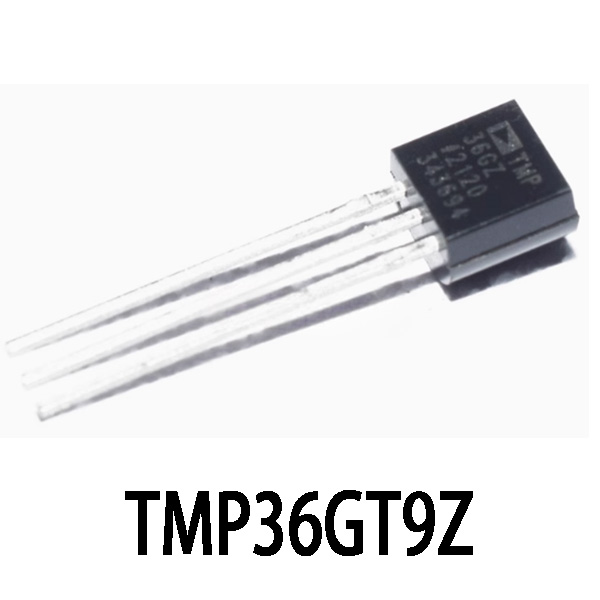
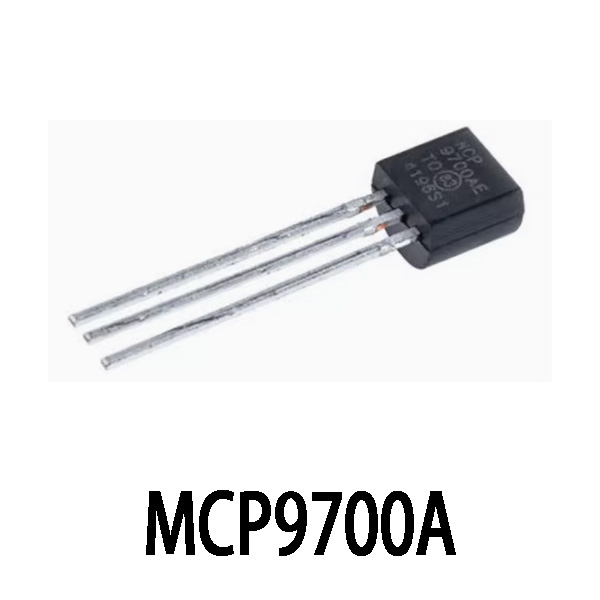
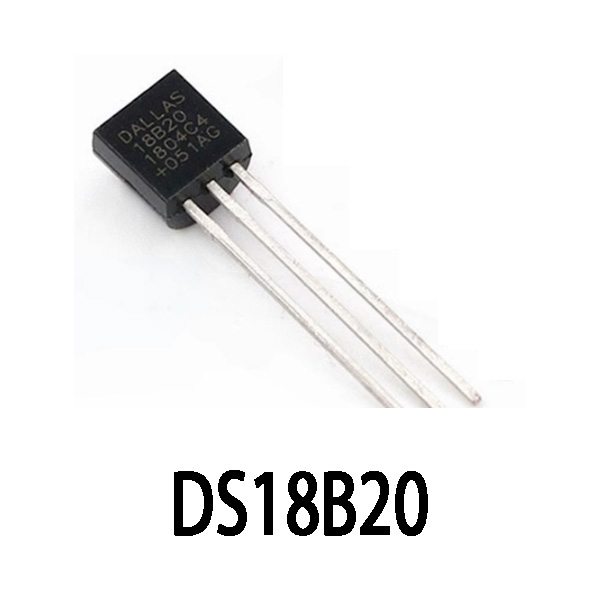
| パラメータ/モデル | LM35DZ/NOPB | LM35CAZ | TMP36GT9Z | MCP9700A | DS18B20 |
|---|---|---|---|---|---|
| パッケージ | TO-92 | TO-92 | TO-92 | TO-92 | TO-92 |
| 温度範囲 | 0°C ~ +100°C | -40°C ~ +110°C | -40℃~+125℃ | -40℃~+125℃ | -55°C ~ +125°C |
| Accuracy (Typical) | ±0.5°C @ 25°C | ±0.4°C @ 25°C | ±1°C @ 25°C | ±2°C @ 25°C | ±0.5°C full range |
| 出力タイプ | アナログ電圧 | アナログ電圧 | Analog Voltage (with offset) | アナログ電圧 | Digital (1-Wire protocol) |
| 動作電圧 | 4V ~ 30V | 4V ~ 30V | 2.7V~5.5V | 2.3V~5.5V | 3.0V ~ 5.5V |
| Output Slope | 10mV / °C | 10mV / °C | 10mV / °C (+500mV offset) | 10mV / °C | 該当なし |
| 互換性に関する注意事項 | Original version | Direct replacement, higher accuracy | Low voltage supply, software offset needed | Lower accuracy, cost-effective and easy to use | Different protocol, circuit/code changes required |
If you’re out of LM35DZ sensors, your best bet is the LM35CAZ—it’s fully compatible, slightly more accurate, and covers a wider range without needing changes. TMP36 also works, but note its output starts at about 500mV at 0°C, so you’ll have to adjust your software to compensate. DS18B20 is digital, super accurate, and reliable, but you’ll have to rewrite your code and rewire the sensor. So, for a quick plug-and-play replacement without messing around, go LM35CAZ or TMP36. But if you’re looking for better accuracy and noise resistance, consider switching to the DS18B20—just be ready to update your setup.
LM35DZ/NOPB Temperature Circuit Example

Take a quick look at this circuit—the LM35 on the left is your temperature sensor, giving you 10mV for each degree Celsius, very straightforward. In the middle is an LM131, a voltage-to-frequency converter, turning the LM35’s analog output into a frequency signal. That makes it easy to transmit signals longer distances or feed digital systems. Those extra capacitors and resistors around it? They’re just there to set the scale and clean up noise. On the right, the 4N28 optocoupler isolates your frequency output, making it safe and stable for industrial or remote setups.
LM35DZ/NOPB Celsius Output Circuit
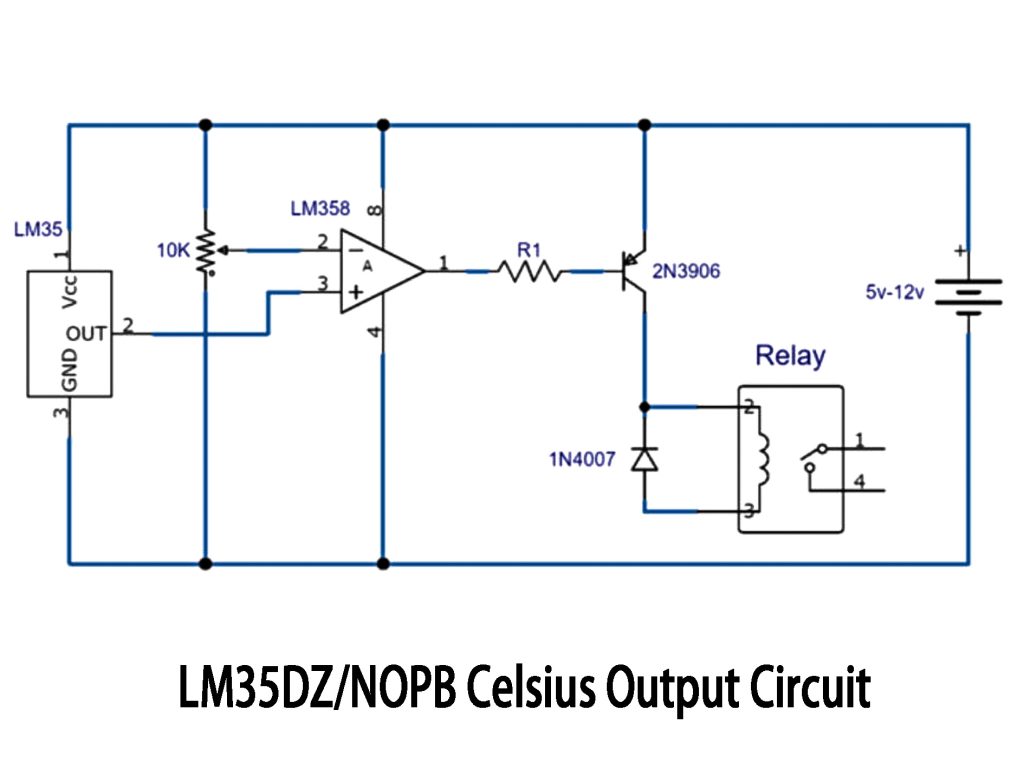
This circuit’s pretty handy. On the left, you’ve got your LM35 sensor—the exact family you’re using (LM35DZ). It outputs temperature directly as voltage, giving you 10mV per degree Celsius. That voltage goes into an LM358 op-amp set up as a comparator. On the other input, there’s a 10K potentiometer so you can set your target temperature. Once the measured temp goes above your setting, the op-amp flips its output. That signal activates the 2N3906 transistor, switching the relay on or off. There’s a diode (1N4007) added to handle reverse currents when the relay switches. It’s a neat, practical circuit for automatic Celsius-based temperature control, just as the title describes.
LM35DZ/NOPB Arduino Wiring Tutorial

Connecting the LM35 sensor to your Arduino UNO is easy. With the flat side of LM35 facing you, the left pin goes to Arduino’s 5V, the middle pin (output) goes straight to analog pin A0, and the right pin connects to GND.
When hooked up, LM35 outputs 10mV per degree Celsius—so at 25°C, you get 250mV. Arduino reads this voltage through analogRead, converts it to a voltage value, then multiplies by 100 to get the temperature in Celsius.
The code’s straightforward: read the analog pin, calculate voltage and temperature, and then print it out via serial. Running this loop every second gives you live temperature readings without hassle.
同様のもの

103HT
テキサス・インスツルメンツ

LM96163CISDX
テキサス・インスツルメンツ

MAX6577ZUT
アナログ・デバイセズ / マキシム・インテグレーテッド
LM75AIM
テキサス・インスツルメンツ

EMC1412-A-AC3-TR
マイクロチップテクノロジー

LM34DZ
テキサス・インスツルメンツ
LM96163CISD
テキサス・インスツルメンツ

SA56004ED
NXPセミコンダクターズ
LM75AIMX
テキサス・インスツルメンツ
LM73CIMK-0
テキサス・インスツルメンツ
AD7814ARTZ
アナログ・デバイセズ
LM75AD
NXPセミコンダクターズ
カートに追加する

TMP75AIDGKR
テキサス・インスツルメンツ

MLX90641ESF-BCA-000-TU
メレキシス・テクノロジーズNV

TMP125AIDBVR
テキサス・インスツルメンツ

MAX30208CLB+T
アナログ・デバイセズ社/マキシム・インテグレーテッド

MCP9701AT-E/TT
マイクロチップテクノロジー
MCP9700AT-E/TT
マイクロチップテクノロジー

LM75BIMX-3
テキサス・インスツルメンツ

LM70CIMMX-3
ナショナルセミコンダクター
AD7814ARTZ
アナログ・デバイセズ
TMP123AIDBVR
テキサス・インスツルメンツ

DS1621S
アナログ・デバイセズ社/マキシム・インテグレーテッド

TMP20AIDCKR
テキサス・インスツルメンツ
関連製品
103HT
テキサス・インスツルメンツ
LM96163CISDX
テキサス・インスツルメンツ
MAX6577ZUT
アナログ・デバイセズ / マキシム・インテグレーテッド
LM75AIM
テキサス・インスツルメンツ
EMC1412-A-AC3-TR
マイクロチップテクノロジー
LM34DZ
テキサス・インスツルメンツ
LM96163CISD
テキサス・インスツルメンツ
SA56004ED
NXPセミコンダクターズ
LM75AIMX
テキサス・インスツルメンツ
LM73CIMK-0
テキサス・インスツルメンツ
AD7814ARTZ
アナログ・デバイセズ
LM75AD
NXPセミコンダクターズ

LM35DZ
テキサス・インスツルメンツ

SGM452TS8G/TR
SGマイクロ

SD5075
杭州SDICマイクロエレクトロニクス

NST1001-QDNR
ノボセンス
CT75MMR
センスリンク

NST175H-QSPR
ノボセンス

CT75MR
センスリンク

SE97BTP
NXPセミコンダクターズ

5962-8757104XA
アナログ・デバイセズ株式会社

DS1821S+
アナログ・デバイセズ社/マキシム・インテグレーテッド

TMP235AEDCKRQ1
テキサス・インスツルメンツ
LM20BIM7/NOPB
テキサス・インスツルメンツ

LM60CIM3/NOPB
テキサス・インスツルメンツ

AD7415ARTZ-0REEL7
アナログ・デバイセズ株式会社

LM34CAZ/NOPB
テキサス・インスツルメンツ

CAT34TS00VP2GT4A
オンセミ

MAX6627MTA+T
アナログ・デバイセズ社/マキシム・インテグレーテッド

AD22100ATZ
アナログ・デバイセズ株式会社
RFQ をお送りください。すぐに対応させていただきます。
