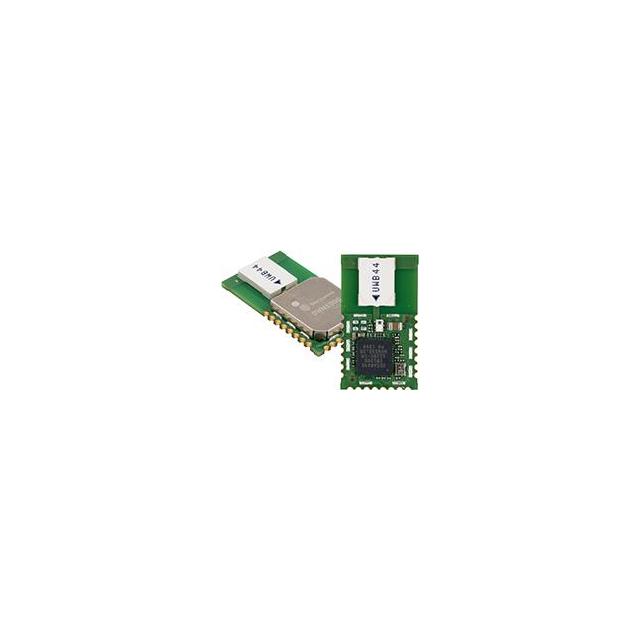
DWM1000 модуль, Arduino, коммутационная плата, техническое описание
- Семейство RF/Стандарт: 802.15.4
- Протокол: ИК-СШП
- Последовательные интерфейсы: СПИ
- Упаковка: Модуль 24-SMD

БЕСПЛАТНАЯ доставка для заказов свыше HK$250.00

Быстрый ответ, быстрая расценка

Быстрая отправка, никаких проблем после продажи

Оригинальный канал, гарантия подлинности продукции
Key Features of the DWM1000
The DWM1000 is a compact, high-performance Ultra-Wideband (UWB) module that enables precise indoor positioning and communication. It supports a range of up to 300 meters in open space, making it ideal for tracking systems, asset management, and real-time location services. The module operates in the 6.5 GHz to 8.5 GHz frequency range, offering low power consumption while maintaining high accuracy. With its ability to achieve centimeter-level precision, the DWM1000 is perfect for applications that require precise distance measurement and reliable data transmission, such as IoT devices, robotics, and industrial automation.
DWM1000 Pinout
| Номер контакта | Имя пин-кода | Описание |
|---|---|---|
| 1 | ВКЦ | Power supply pin, typically 3.3V. |
| 2 | Земля | Ground pin, connected to the system ground. |
| 3 | MISO | Master In Slave Out, used for SPI data reception. |
| 4 | MOSI | Master Out Slave In, used for SPI data transmission. |
| 5 | SCK | Serial Clock, used to synchronize SPI data communication. |
| 6 | КС | Chip Select, used to select the DWM1000 module for SPI communication. |
| 7 | RST | Reset pin, used to reset the module. |
| 8 | IRQ | Interrupt pin, used for receiving interrupts from the module. |
| 9 | TXD | Transmit Data, used for UART communication. |
| 10 | RXD | Receive Data, used for UART communication. |
Pinout Usage and Notes
The DWM1000 module is designed for SPI and UART communication, and its pins should be connected to the corresponding pins on your microcontroller or development board. VCC and GND provide the power and ground connections. The SPI pins (MISO, MOSI, SCK, and CS) allow for fast data communication between the module and your microcontroller. The RST pin can be used to reset the module if necessary. For interrupt-driven applications, the IRQ pin is used to handle interrupts. Ensure proper connections, especially for power and SPI lines, to ensure smooth operation.
DWM1000 Equivalent Models
| Модель | Frequency Range | Max Range | Скорость передачи данных | Интерфейс | Потребляемая мощность | Тип упаковки |
|---|---|---|---|---|---|---|
| DWM1000 | 6.5 GHz to 8.5 GHz | 300m | 6.8 Mbps | СПИ | 120mA | QFN-32 |
| Qorvo DW1000 | 6.5 GHz to 8.5 GHz | 300m | 6.8 Mbps | СПИ | 110mA | QFN-32 |
| Decawave DWM3000 | 6.5 GHz to 8.5 GHz | 400m | 6.8 Mbps | СПИ | 80mA | QFN-38 |
| NXP JN5189 | 2,4 ГГц | 150m | 100 kbps | СПИ | 18mA | QFN-32 |
Equivalent Models Usage and Notes
The DWM1000 is an excellent choice for UWB applications, but models like the Qorvo DW1000 and Decawave DWM3000 offer similar functionality with slight differences. The DW1000 and DWM1000 are nearly identical in range and data rate, so either can be used depending on availability. The DWM3000 offers a greater range of up to 400 meters and lower power consumption, making it a good upgrade for systems needing more coverage and efficiency. On the other hand, the NXP JN5189 is a lower-cost option with a reduced range and lower data rate, making it suitable for simpler, lower-power applications. Always ensure the range, power, and interface requirements match your specific needs when choosing an alternative.
DWM1000 with Arduino
The DWM1000 module is an excellent choice for adding precise location tracking capabilities to your Arduino projects. By using the DWM1000, you can achieve accurate indoor positioning with centimeter-level precision. The module communicates via SPI, so connecting it to an Arduino is straightforward, allowing for easy integration into your existing setup. Whether you’re building a robot, asset tracker, or any other project requiring real-time location data, the DWM1000 is a reliable and effective solution.
DWM1000 Arduino Library
To make the integration of the DWM1000 with Arduino even easier, there are several libraries available that simplify communication with the module. The DWM1000 Arduino library allows you to access all of the module’s features, including distance measurement, communication, and position tracking. It’s easy to install and comes with example code to help you get started quickly. This library makes it simple to implement the DWM1000 in your project without needing to manually configure the low-level communication details.
DWM1000 Breakout Board
Using a DWM1000 breakout board is a great way to simplify wiring and connect the module to your Arduino. These boards are designed to make the DWM1000 easier to work with, providing clear pinouts and sometimes additional features like voltage regulation. They often come with helpful documentation, so you can easily get started with your UWB project. Whether you’re building a positioning system or working on wireless communication, the breakout board is an essential tool for making the DWM1000 module more accessible and easier to use in your Arduino projects.
DWM1000 Circuit Diagram and Analysis
The DWM1000 is a compact Ultra-Wideband (UWB) module designed for precise indoor positioning and communication. Its application circuit typically involves connecting the module to a microcontroller via the Serial Peripheral Interface (SPI) for data communication. Additionally, a 3.3V power supply is required to operate the module, as it is not 5V-tolerant. A logic level converter is often used to interface the 3.3V logic of the DWM1000 with the 5V logic of common microcontrollers like the Arduino.
Key Components in the Circuit
-
Microcontroller (e.g., Arduino): Acts as the host processor, managing communication with the DWM1000 module.
-
DWM1000 Module: The UWB transceiver responsible for sending and receiving data.
-
Logic Level Converter: Ensures safe communication between the 3.3V DWM1000 and 5V microcontroller.
-
3.3V Power Supply: Provides the necessary voltage for the DWM1000 module.
-
Antenna: Facilitates UWB signal transmission and reception.
Circuit Diagram
Analysis
In this configuration, the microcontroller communicates with the DWM1000 module via SPI, utilizing pins for clock (SCK), master-out-slave-in (MOSI), master-in-slave-out (MISO), and chip select (CS). The logic level converter ensures that the voltage levels between the microcontroller and the DWM1000 are compatible, preventing potential damage to the module. The 3.3V power supply is crucial, as applying 5V directly to the DWM1000 can permanently damage it. The antenna is essential for UWB communication, enabling accurate distance measurements and positioning.
Usage Notes
-
Источник питания: Always use a 3.3V supply for the DWM1000 module.
-
Logic Level Conversion: Employ a logic level converter when interfacing with 5V logic systems.
-
Antenna Placement: Position the antenna away from metal objects to minimize signal interference.
-
SPI Configuration: Ensure correct SPI settings (clock polarity and phase) as per the DWM1000 datasheet.
-
PCB Design: For custom PCBs, refer to the DWM1000 module’s land pattern and layout guidelines to ensure proper signal integrity and power distribution.


