
МАКС6675 Пример и таблица данных Arduino | Термопара
- Бренды: Аналоговые устройства / Maxim Integrated
- Скачать: -
- Цена: расследование
- В наличии: 17698
- Бренд: Аналоговые устройства / Maxim Integrated
- Тип продукта: Интерфейс сенсора
- Подкатегория: Интерфейсные микросхемы
- Упаковка: -


БЕСПЛАТНАЯ доставка для заказов свыше HK$250.00

Быстрый ответ, быстрая расценка

Быстрая отправка, никаких проблем после продажи

Оригинальный канал, гарантия подлинности продукции
TCMAX6675-G55 | 0-600C MAX6675 K-TYPE THERMOCOUPLE Temperature MOD
МАКС6675
If you need to measure high temperatures with a microcontroller, the MAX6675 is definitely your friend. It reads K-type thermocouples and converts the signal directly into digital data. The best part? It handles cold-junction compensation internally, so you don’t need an extra sensor for ambient temperature correction.
With about ±2°C accuracy and 0.25°C resolution, it covers temperatures from 0°C to 1024°C—perfect for ovens, heating plates, or even industrial furnaces. It also has built-in filtering to keep readings stable and reliable. Its SPI interface is plug-and-play with Arduino and ESP32 boards, and it runs comfortably between 3.0 and 5.5 volts, making your setup simple and quick.
MAX6675 Pinout

| Номер контакта | Имя пин-кода | Описание функции |
|---|---|---|
| 1 | T- | Thermocouple negative input (K-type) |
| 2 | T+ | Thermocouple positive input (K-type) |
| 3 | Земля | Ground (power negative) |
| 4 | ВКЦ | Power input (3.0V ~ 5.5V) |
| 5 | SCK | SPI clock input (from host) |
| 6 | КС | Выбор микросхемы SPI, активный низкий уровень |
| 7 | ТАК | SPI data output (temperature data) |
| 8 | NC | No connection (internally unused) |
When you’re wiring the MAX6675, pay close attention to thermocouple polarity: for a K-type, T+ is Chromel (positive) and T- is Alumel (negative). Mixing these up can give you incorrect or negative temperature readings. You can power it from either 3.3V or 5V depending on your microcontroller, and make sure to use pull-up resistors or check logic compatibility on the SPI pins (SCK, CS, SO).
Also, remember it’s not hot-swappable, so connect the thermocouple before powering it up to avoid data glitches. The MAX6675 doesn’t have built-in calibration, so if high accuracy matters, consider doing your own calibration.
MAX6675 Equivalent


| Параметр | МАКС6675 | MAX31855K | MAX31856 | MCP9600 |
|---|---|---|---|---|
| Тип интерфейса | СПИ | СПИ | СПИ | I²C |
| Thermocouple Type | K type | K type | Multiple types (K/J/T/N, etc.) | Multiple types (K/J/T/N, etc.) |
| Разрешение | 0.25°C | 0.25°C | 0.0078125°C | 0.0625°C |
| Диапазон температур | 0 ~ 1024°C | -200 ~ 1350°C | Depends on thermocouple | -200 ~ 1372°C |
| Accuracy (at room temp) | ±2°C | ±2°C | ±1~2°C | ±1.5°C |
| Рабочее напряжение | 3.0 ~ 5.5V | 3.0 ~ 3.6V | 3.0 ~ 3.6V | 2.7 ~ 5.5V |
| Тип упаковки | СОП-8 | СОП-8 | СОИК-16 | MSOP, DFN, etc. |
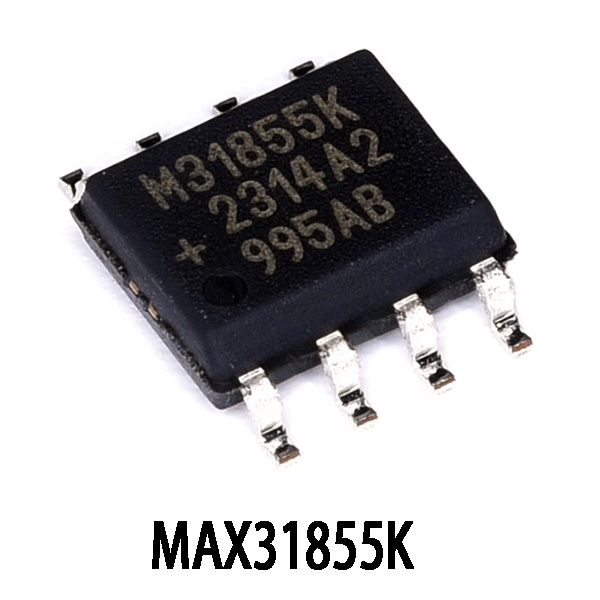
If you’re looking for a direct replacement for MAX6675, the MAX31855K is your best bet. It’s practically identical—same package, same interface, similar accuracy. You can almost swap it right in. Just keep in mind it only works at 3.3V, so don’t accidentally hook it up to 5V.
If you need higher accuracy or support for multiple thermocouple types, consider the MAX31856. It’s much more powerful, but comes in a 16-pin package, meaning you’ll have to redesign your PCB. The MCP9600 is another option, but it uses I²C, making it unsuitable for direct replacement without redesigning your circuit layout.
MAX6675 Thermocouple Circuit Example
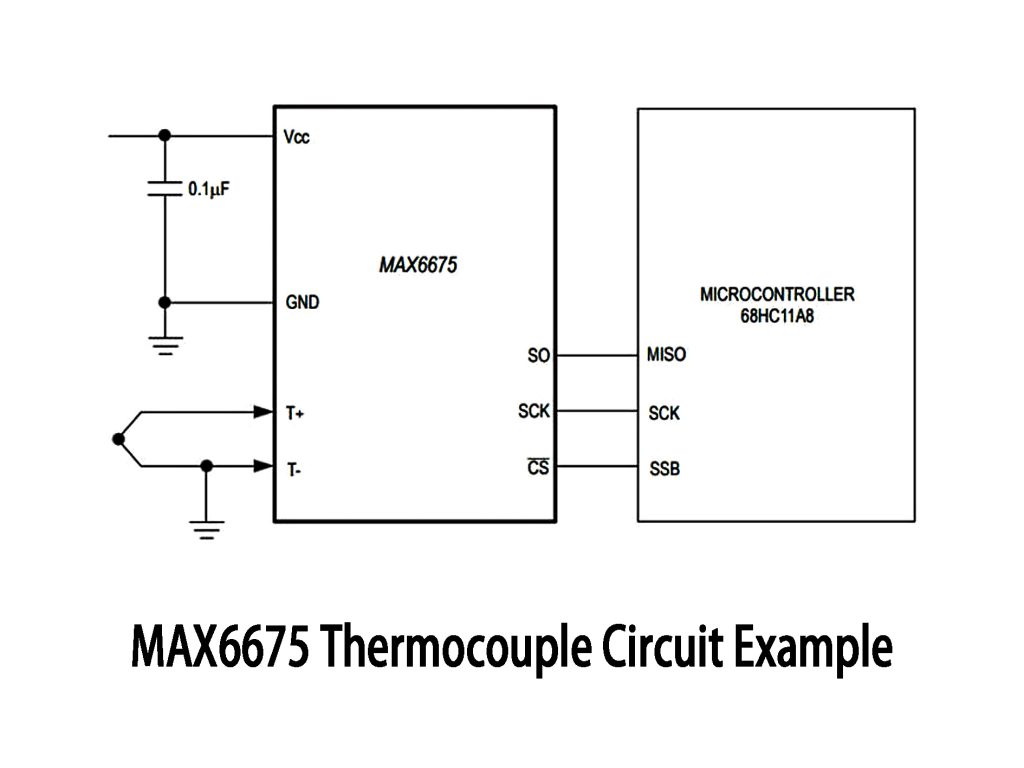
When wiring up the MAX6675, make sure your K-type thermocouple connects correctly: T+ for positive, T- for negative. Mixing these up can cause weird readings or negative values. Power it via VCC and GND, and use a 0.1μF capacitor nearby to filter noise for stable measurements.
For SPI communication, connect SO to your microcontroller’s MISO, SCK to your MCU’s SPI clock, and pull CS low from your controller to start communication. Keep thermocouple wires short to reduce interference; if they’re long, consider adding an RC filter or shield.
The MAX6675 is directly compatible with 5V MCUs. If you’re using a 3.3V system, double-check SPI logic levels to make sure everything matches up smoothly.
MAX6675 Arduino Wiring Project
Here’s how you easily wire a MAX6675 with an Arduino UNO: connect VCC to 5V, GND to ground, SO pin to Arduino D12 (MISO), SCK to D13, and CS to D10 (you can pick another pin like D9 or D8 if you prefer). Double-check your thermocouple polarity (usually red is negative), since reversed connections cause incorrect readings.
For code, use the MAX6675 library—it’s straightforward. After setting up your pins and initializing the sensor, you’ll see temperature readings through the Serial Monitor. If you get constant readings of -1 or 0°C, your thermocouple might be loose or damaged, so reconnect it. Stick to 5V power for best stability, as 3.3V can sometimes give you inconsistent results.
Больше похожего

72221L15JGI
IDT, Интегрированные технологии устройств Inc.
7201LA20TP
IDT, Интегрированные технологии устройств Inc.
72V221L15PFG
IDT, Интегрированные технологии устройств Inc.

74HC40105PW,112
NXP USA Inc.

74HC40105DB,112
NXP USA Inc.

74HCT7403D-Q100,51
NXP USA Inc.
74HC7403D-Q100,518
NXP USA Inc.
74HCT7403D,518
NXP USA Inc.
74HCT7403D,512
NXP USA Inc.

74HCT7030D,118
NXP USA Inc.
72V241L15PFG
Renesas Electronics America Inc
72V3650L7-5BBI8
Renesas Electronics America Inc
Также добавить в корзину

MC74HC4538AFR2
онсеми

STM32F100C8T6B
STMicroelectronics

MAX3881ECB
Analog Devices Inc./Maxim Integrated
PEB4264TV1.1GD
Технологии Инфинеон

LTC6405CMS8E#PBF
Аналоговые Устройства Inc.

OPA2171AQDGKRQ1
Техасские инструменты

VSC3104YVP-01
Технология микрочипов

TCKE805NA,RF
Toshiba Semiconductor и системы хранения данных

CDCL1810ARGZT
Техасские инструменты

IXCY20M45
IXYS

XC2C384-10FTG256I
AMD Xilinx

TMS320C6421ZWTQ6
Техасские инструменты
Сопутствующие товары
72221L15JGI
IDT, Интегрированные технологии устройств Inc.
7201LA20TP
IDT, Интегрированные технологии устройств Inc.
72V221L15PFG
IDT, Интегрированные технологии устройств Inc.
74HC40105PW,112
NXP USA Inc.
74HC40105DB,112
NXP USA Inc.
74HCT7403D-Q100,51
NXP USA Inc.
74HC7403D-Q100,518
NXP USA Inc.
74HCT7403D,518
NXP USA Inc.
74HCT7403D,512
NXP USA Inc.
74HCT7030D,118
NXP USA Inc.
72V241L15PFG
Renesas Electronics America Inc
72V3650L7-5BBI8
Renesas Electronics America Inc
72V241L15PFG8
Renesas Electronics America Inc
72V36100L7-5BBI8
Renesas Electronics America Inc
72V3660L7-5BBI8
Renesas Electronics America Inc
72245LB10PFGI
Renesas Electronics America Inc

72V36100L6BCY
Renesas Electronics America Inc
72201L25JG8
Renesas Electronics America Inc
72V36110L7-5BBG8
Renesas Electronics America Inc
72V811L10PFG
Renesas Electronics America Inc
72V3670L6BCY8
Renesas Electronics America Inc
72V811L15PFG8
Renesas Electronics America Inc
72V3680L7-5BCYI
Renesas Electronics America Inc
72V3680L6BCY
Renesas Electronics America Inc
72V3680L7-5BBI8
Renesas Electronics America Inc
72V3690L7-5BBI8
Renesas Electronics America Inc
72V3680L7-5BCYI8
Renesas Electronics America Inc
72V3640L6BCY
Renesas Electronics America Inc
72201L25JG
Renesas Electronics America Inc
72V3690L6BCY8
Renesas Electronics America Inc
Пожалуйста, отправьте запрос предложения, мы ответим немедленно.
